- Be sure to keep your reCAPTCHA keys secret
- Use Wordpress's admin-post.php to handle POST data correctly
Spam emails are the worst. And I mean, the worst. Recently, I experienced an uptick in “persons” interested in “improving my SEO, and redesigning my site to increase traffic.” If you’ve ever spent more than two hours on the internet, though, it’s pretty obvious that these emails were sent by a bot. So how did a bot happen to target my contact form and repeatedly spam me? Well, it was mostly laziness on my part – when I initially built my site, I opted to use a (free) WordPress plugin to build up my contact form. I’m not going to give that plugin the benefit a callout, but after doing a little investigating, the plugin was creating hidden span elements in the form that perfectly called out exactly what plugin I was using, the version of that plugin, and the version’s release date. Basically, information that would be super easy for a spider to crawling the internet to glean. Honestly, I wouldn’t be shocked if the person that released the plugin was the very same person behind the spam. That’s a discouraging thought, but I digress…
So what’s the best way to combat this sort of web-crawler-powered spam bot attack? By ditching the (free) plugin route, and writing your own contact form, of course! Before I get too much into this, realize that while it does take a little background knowledge to put something like this together, it’s 2017 and a million people have done this sort of thing over the years – it took me about an hour and a half on a Friday night to accomplish this. If you came across this post, and are only trying to figure out a piece of this puzzle, rather than get a full tutorial, I’ve broken each component of this down into its own section. Note that I’ll be giving some specific details that pertain to WordPress, but this code will work just fine without WordPress or really any content management system (CMS), for that matter.
reCAPTCHA V2
Quick primer on reCAPTCHA V2. This is a google offering that you’re more than likely familiar with, even if you didn’t know it by name. It’s a little deeper than this, which makes it particularly neat piece of technology, but it effectively combats spam by offering up “puzzles” that are damn near impossible for modern bot-scripts to decode.

The first step in gaining access to the reCAPTCHA V2 resource is to navigate to their site, log in with your google account (obviously), then follow through with their dialogs. Next, you’ll want to register your site with the reCAPTCHA service. Give your site a label (nickname), then I’d recommend you choose reCAPTCHA V2 rather than Invisible reCAPTCHA. That’s what the rest of this post will be referring to, anyway. Place your domain in the given text box – mine would be agcross.com, for example, then accept the terms of service and hit the Register button.

Once you’ve completed this step, you’ll be taken to the next page where you’ll have access to two important keys that we’ll be using shortly – a Site key, and a Secret key. They look like this:
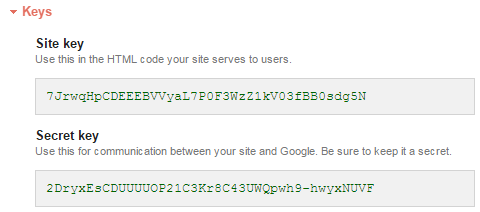
Note: do not share thes keys anywhere. You need these to stay exclusively secret for them to technically be useful (and don’t worry, I generated all new keys just for this example).
PHP
We’ll be using PHP here to accomplish two distinctly different tasks – wrapping the front-end HTML code that creates the form itself, and for processing the form’s inputs and actually sending the email on its way. Let’s start with generating the form. If you’re using WordPress, you’re going to probably want to use a page template for this next step. Otherwise, I’m going to assume you have enough background knowledge to get HTML code onto your site. To make this easy on you, I’ll go ahead and reference the live code located on my contact page, so that you can see my contact form working in action.
Building the Form
The first thing you’ll notice with the form’s code below is that there’s actually no PHP – it’s all strict HTML. In fact, it’s composed of the the same basic form elements that have been around for at least 25 years. Note here that you’ll be replacing the data-sitekey tag with your sitekey that you were granted during the previous step.
[code]
<form action="" method="post">
<p><span class="contactBox"><input type="text" name="your-name" value="" size="80" id="contactName" aria-required="true" aria-invalid="false" placeholder="Your Name"></span><br>
<span class="contactBox"><input type="email" name="your-email" value="" size="80" id="contactEmail" aria-required="true" aria-invalid="false" placeholder="Your Email Address"></span></p>
<p><span class="contactBox"><textarea name="your-message" cols="78" rows="8" id="contactMessage" aria-required="true" aria-invalid="false" placeholder="Your Message"></textarea></span></p>
<div class="g-recaptcha" data-sitekey="7JrwqHpCDEEEBVVyaL7P0F3WzZ1kV03fBB0sdg5N"></div>
<p><input type="submit" value="Send"><span class="ajax-loader"></span></p>
<div id="contact_form_results"></div>
</form>
[/code]
You want to make sure that you’ve included method=”post” in your form’s opening bracket. It doesn’t matter whether you include anything between the action quotations or not since we’ll be accomplishing the “action” functionality with Javascript (AJAX), but I’d recommend leaving it blank just to further confuse any web-crawlers that may come across the site. I’ve added classes to each of the span element to make CSS styling easier, and I’ve thrown in some ARIA elements to make the form act more like the forms people are used to seeing in 2017. Lastly, I’ve included an empty div, #contact_form_results, that we’ll use later in conjunction with some AJAX code to make the form responsive and interactive with the user.
Building the Mailer
Since we’re in the PHP section of the article, we’re going to jump ahead of ourselves a little bit and knock out the code that responsible for actually sending the email. This code is actually completely independent of the AJAX or the reCAPTCHA validation – you could use this very same code with a standard form ‘submit’ button if you’d like. However, if you’re using WordPress, there are some built-in functions of the software that improve the security of this code, and allow you to skip the step of configuring your email server. Note: if you’re not using WordPress, or would rather use gmail’s SMTP server, use the PHPMailer library.
At its core, this code is dead simple. It takes text strings that were submitted to it through the POST method, sanitizes and strips those strings of potentially harmful code, then uses the wp_mail function to actually send the email on its way! No, I didn’t spend the time writing this. I lifted it from a stackoverflow example.
[code]
$name = strip_tags(trim($_POST["name"]));
$name = str_replace(array("\r","\n"),array(" "," "),$name);
$email = filter_var(trim($_POST["email"]), FILTER_SANITIZE_EMAIL);
$message = trim($_POST["message"]);
if ( empty($name) OR empty($message) OR !filter_var($email, FILTER_VALIDATE_EMAIL)) {
http_response_code(400);
echo "Oops! There was a problem with your submission. Please complete the form and try again.";
exit;
}
$recipient = "YOUREMAILADDRESS@YOUREMAILDOMAIN.com";
$subject = "YOURWEBSITE.com contact form message from $name";
$email_content = "Name: $name\n";
$email_content .= "Email: $email\n\n";
$email_content .= "Message:\n$message\n";
$email_headers = "From: $name <$email>";
if (wp_mail($recipient, $subject, $email_content, $email_headers)) {
http_response_code(200);
echo "Thank You! Your message has been sent.";
} else {
http_response_code(500);
echo "Oops! Something went wrong, and we couldn’t send your message. Check your email address.";
}
[/code]
Okay, with this code established, what we want to do is add it to your WordPress theme’s functions.php file. At the same time, we want to add in some IF/THEN conditional validation, and also add in some code for dealing with reCAPTCHA. I’ll explain what’s going on here in the next section, so for now just copy and paste this contact_form_mailer() function into your functions.php file. For this to work for you, you must modify the $response variable to include your reCAPTCHA secret key! Also be sure to correct the $recipient and $subject variables to include your details.
[code]
function contact_form_mailer(){
//Taken from here: http://stackoverflow.com/questions/40524029/ajax-jquery-contact-form-with-recaptcha-v2-clears-form-if-invalid
// If the form was submitted
if ($_SERVER["REQUEST_METHOD"] == "POST") {
// If the Google Recaptcha box was clicked
if(isset($_POST[‘captcha’]) && !empty($_POST[‘captcha’])){
$captcha=$_POST[‘captcha’];
$response=file_get_contents("https://www.google.com/recaptcha/api/siteverify?secret=2DryxEsCDUUUUOP21C3Kr8C43UWQpwh9-hwyxNUVF&response=".$captcha."&remoteip=".$_SERVER[‘REMOTE_ADDR’]);
$obj = json_decode($response);
// If the Google Recaptcha check was successful
if($obj->success == true) {
$name = strip_tags(trim($_POST["name"]));
$name = str_replace(array("\r","\n"),array(" "," "),$name);
$email = filter_var(trim($_POST["email"]), FILTER_SANITIZE_EMAIL);
$message = trim($_POST["message"]);
if ( empty($name) OR empty($message) OR !filter_var($email, FILTER_VALIDATE_EMAIL)) {
http_response_code(400);
echo "Oops! There was a problem with your submission. Please complete the form and try again.";
exit;
}
$recipient = "YOUREMAILADDRESS@YOUREMAILDOMAIN.com";
$subject = "YOURWEBSITE.com contact form message from $name";
$email_content = "Name: $name\n";
$email_content .= "Email: $email\n\n";
$email_content .= "Message:\n$message\n";
$email_headers = "From: $name <$email>";
if (wp_mail($recipient, $subject, $email_content, $email_headers)) {
http_response_code(200);
echo "Thank You! Your message has been sent.";
}
else {
http_response_code(500);
echo "Oops! Something went wrong, and we couldn’t send your message. Check your email address.";
}
}
// If the Google Recaptcha check was not successful
else {
echo "Robot verification failed. Please try again.";
}
}
// If the Google Recaptcha box was not clicked
else {
echo "Please click the reCAPTCHA box.";
}
}
// If the form was not submitted
// Not a POST request, set a 403 (forbidden) response code.
else {
http_response_code(403);
echo "There was a problem with your submission, please try again.";
}
}
[/code]
Javascript (AJAX)
Here’s where everything comes together and hopefully starts to make sense. Quick reminder, what we’re doing here is effectively replacing the standard ‘submit’ button functionality so that instead of sending the form’s contents directly to a php mailer script, it routes through an AJAX call. Why? Because low-effort bots can easily take advantage of standard ‘submit’ button functionality, but javascript is basically invisible to them. At the same time, by using AJAX, the contact form can be submitted to the server (and return a response) without refreshing the page. How modern! Place the following javascript code in the HTML of your contact page:
[code]
<script type="text/javascript">
$(document).ready(function() {
var contactForm = $(".contact");
//We set our own custom submit function
contactForm.on("submit", function(e) {
//Prevent the default behavior of a form
e.preventDefault();
//Get the values from the form
var name = $("#contactName").val();
var email = $("#contactEmail").val();
var message = $("#contactMessage").val();
//Our AJAX POST
$.ajax({
type: "POST",
url: "http://www.agcross.com/wp-admin/admin-post.php",
data: {
name: name,
email: email,
message: message,
action: "fromage_form_submit",
//THIS WILL TELL THE FORM IF THE USER IS CAPTCHA VERIFIED.
captcha: grecaptcha.getResponse()
},
success: function() {
console.log("THE FORM SUBMITTED CORRECTLY");
$("#contact_form_results").html("Thank you! Your message was sent successfully.")
},
error: function() {
console.log("AN ERROR OCCURED SUBMITTING THE FORM");
$("#contact_form_results").html("An error occured. Please contact me and…err, this is awkward.")
}
})
});
});
</script>
[/code]
There are a couple of key aspects to this code that you’ll want to make sure you understand.
- var contactForm is defined by the div with the class ‘contact’. Since I only gave you the form HTML code above, you’ll need to make sure it’s wrapped in a div with class=”contact”. Once again, look at my contact page for reference.
- You’ll notice that the javascript pulls the text values from the inputs named #contactName, #contactEmail, and #contactMessage. If you modify the form I gave you, you’ll need to update this javascript as well.
- Within the actual $.ajax call, the url that the AJAX submits to is admin-post.php, which is within the wp-admin folder of your WordPress installation. More details on this below.
- The getResponse() method of the grecaptcha object passes along whether or not the reCAPTCHA has been “passed”.
- A response from the server is returned and written to the #contact_form_results div. This is important to give the user some feedback to indicate that pushing the submit button actually did something.
Let’s talk a little bit more about that admin-post.php file that the AJAX call submits to. There’s a good primer that explains its purpose here, but by pointing a form to this file, it basically “authenticates” the code that we placed in the functions.php file (which in technically in a theme folder that is not part of the core code). Here’s the trick: in that functions.php file, we’re missing an add_action() hook. Since the AJAX is submitting the form data to the admin-post.php, that admin-post.php needs to know what to do with that data! Add the following hook above the contact_form_mailer() definition in the functions.php file.
[code]add_action(‘admin_post_fromage_form_submit’,’contact_form_mailer’);[/code]
The astute reader will notice the word ‘fromage’ is weirdly thrown into the above add_action() hook. Where did this come from, and why did I do that? If you look at the javascript code we developed, you’ll notice that the data array contains an action element that’s been defined as “fromage_form_submit”. The first term in the add_action() hook is simply admin_post + this action definition. The reason for this is that I didn’t want to include the string “contact_form_submit” anywhere in the code. That would have made it easier for a bot to identify that the javascript was submitting contact form data!
Summary
If you made it this far into the post, congratulations! There’s a good chance that you have a perfectly functioning contact form! Let me know, in the comments section below, if you run into any problems following this guide.
EDIT – 10/4/17
I just realized that my contact form was not functioning as it should. After some searching, I discovered that the WP Fastest Cache plugin was, for some reason, keeping the form from functioning. I disabled, then re-enabled, WP Fastest Cache, and the form instantly began working again. Be sure to check and sort of caching or compression plugin you may have installed if you’re attempting to troubleshoot your implementation.